Understanding the Role of Mouse Cursor Crosshairs
The mouse cursor is a pivotal tool in any computer-aided design (CAD) application, such as NX CAD. Among its various features, the mouse cursor’s crosshairs serve a significant purpose in enhancing user precision and workflow efficiency. In this article, we will explore the importance of mouse cursor crosshairs in NX CAD, emphasizing how they contribute to accurate design and model manipulation.
Precision in Selection and Navigation
One of the main advantages of utilizing crosshairs in NX CAD is the improved precision they offer during the selection of objects or navigation through complex designs. The distinct center point provided by crosshairs allows designers to easily identify exact locations for modifications, ensuring higher accuracy in the positioning of components and features within the CAD model. This feature is particularly valuable when working on intricate parts, where even a slight deviation can lead to substantial errors.
Boosting Productivity and Reducing Errors
Incorporating mouse cursor crosshairs also plays a key role in boosting productivity. By providing a clear visual aid, designers can execute commands and navigate through the software more swiftly. The intuitive nature of crosshairs allows users to focus on their tasks without constantly adjusting or recalibrating their selections, ultimately reducing the potential for errors. In a fast-paced design environment, these small advantages can significantly impact overall output and efficiency.
Enabling Cursor Crosshairs for Better Navigation in NX
1. Open any existing piece part or assembly or create a new part.
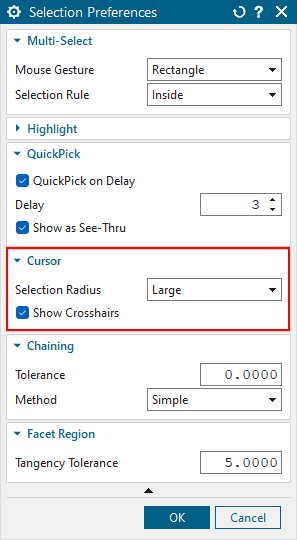
2. Go to the ‘Selection Preferences’ by following the path
File > Preferences > Selection or
Menu > Preferences > Selection or
Use the keyboard shortcut ‘Ctrl + Shift + T‘
3. In the ‘Cursor‘ group, tick the ”Show Crosshairs” checkbox and click OK button.

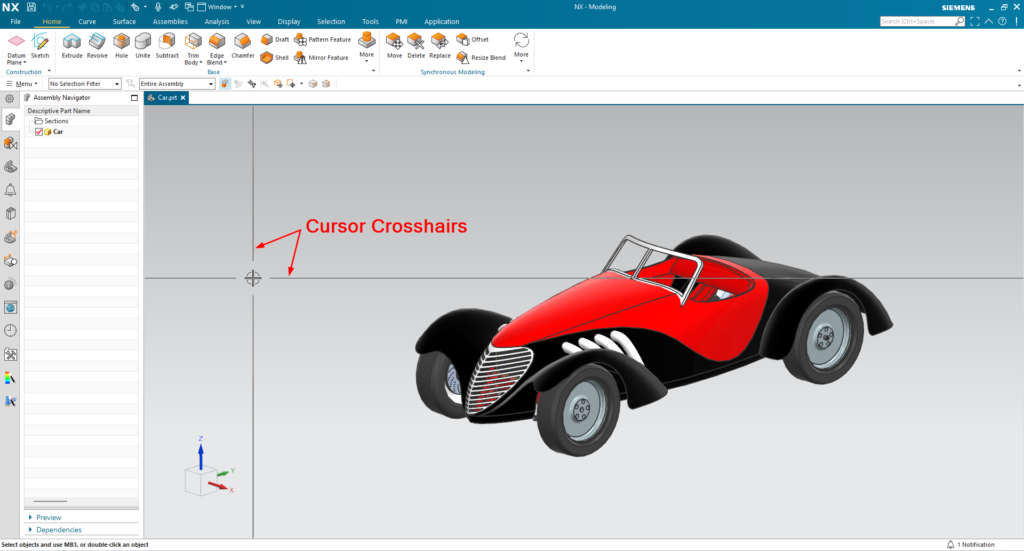
Now cursor crosshair will be displayed in the NX graphics window. Switching from Modeling applications to other applications like Drafting, Sheet Metal, etc., will retain the crosshair display.
The size of the selection cursor radius can be changed using the ‘Selection Radius‘ option, which has three values: Small, Medium, and Large. By default, it is set to Medium.

To Disable the crosshair display, go to the selection preferences and uncheck the checkbox ‘Show Crosshairs’ and click the OK button.
Note
1. If the cursor is over an area where object density is high, NX uses the small ‘Selection Radius’ size.
2. No customer default setting is available to control the cursor crosshairs display.
From NX 1847 onwards, this setting is stored at the below location
e.g. C:\Users\UserName\AppData\Local\Siemens\NX1980\UserPreferences.txt
Until NX 12, the ‘Show Crosshairs’ setting was stored in the registry at the below location
e.g. HKEY_CURRENT_USER > Software > Unigraphics Solutions > NX > Selection > Crosshairs
Links: NX Design Forum | NX Documentation | NX CAD Tips
